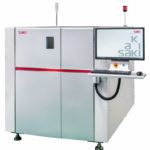
3D X-ray provides inspection where classical automated optical inspection has limitations. Previously, most X-ray inspection was done off-line, but the inclusion of many more electronic parts in too-critical-to-fail products that require high-volume assembly with high throughput and yield, necessitates inline inspection. AXI equipment needs to be faster, ever more accurate, and adopt innovative technological and machine-to-machine (M2M) capabilities to keep pace and deliver products that ensure quality and reliability. To meet these requirements, Saki has developed the 3Xi-M110 automated X-ray system.
Planar computed tomography provides accurate volumetric data
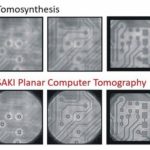
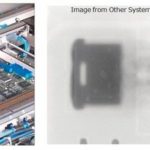
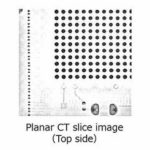
To meet the demands for high-quality inspection, the company invented its unique planar computed tomography (PCT) technology, which provides volumetric and shape inspection of solder joints. PCT is an extension of the CT (computed tomography) technology used in the medical field for many years. PCT completely separates the images of the top and bottom sides of the printed circuit board assembly (PCBA), so images are not affected by back-side mounting.
Many X-ray systems use a process of subtraction to remove the substrate images, whereas the company’s true 3D system uses an additive process. High-resolution 3D images are made by capturing more than 200 slices (conventional X-ray systems typically capture less than 10 views or slices) through the entire PCBA area, including mounted components, solder joints, and even PCB warpage. This makes it possible to perform detailed volumetric and shape inspection on all parts of the PCB or module. After capturing the images, the system accurately reconstructs the slices into the shape of the solder ball and fillet (meniscus) to perform reliable solder inspection.
Using this process, the system does not just inspect, it combines layers, measures components and features, determines placement variance and board or substrate warpage, and analyzes the internal structures. Measured solder joints are compared to established tolerances and all types of defects, including head-in-pillow (HiP), are identified and classified. PCT is essential for high accuracy defect detection.
Hardware design provides better accuracy and image quality
Starting with the right hardware is a key factor to realizing accurate inspection and obtaining perfect 3D images. All of the company’s inspection systems are built on a casted iron frame to maintain a rigid and stable platform. A combination of 1-micron analog linear encoders, servo motors on each axis, complex precision calibration, and the stable and robust hardware structure enables exact positioning, sharp clear images, and ensures that the data results collected and communicated are accurate and reliable.
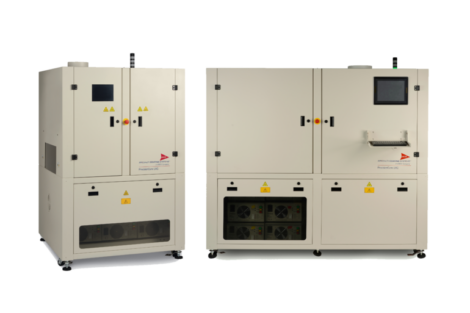
The AXI, 3Xi-M110 footprint is approximately 25 % smaller and 30 % lighter than previous models. With its super compact design and lighter weight, the machine can be installed in any standard building upper floors and easily transported. The machine can handle printed circuit boards that are 50 mm (W) x 140 mm (L) to 360 mm (W) x 330 mm (L) in size. For larger boards, a 2-step capturing and loading process can inspect boards that are 360 mm (W) x 510 mm (L) in size. Advanced applications, such as HiP inspection, have a 20 % faster capture time and are even more accurate.
Accurate seamless 3D image reconstruction technology
PCT technology provides high resolution in both the horizontal and vertical directions. For each PCB image slice, the AXI system provides completely separated images of the top and bottom sides. Because there are separate images for each field of view (FOV), these images can be reconstructed and connected into one image for a seamless 3D constructed model. Automatic board warpage compensation is performed while the image slices are taken to suppress board warpage.
Saki America’s 3D AOI/SPI combo, 3D AXI system for PCBAs, and M2M software
Automatic warpage compensation
Robust warpage compensation is an essential function for accurate height reconstruction. Usually, an inspection tool, such as a laser, is used and the inspection machine has to be manually programmed with the exact location on the PCB where surface height is to be measured. This results in additional programming time and program optimization, and warpage of the surface underneath a covered surface is unknown. The company’s AXI system can automatically inspect the pad layer, measure warpage height, and automatically perform warpage compensation anywhere on the product.
Head-in-pillow inspection algorithm
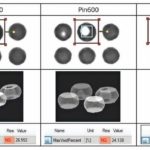
Head-in-pillow (HiP) is a defect of the solder joint caused by the failure of the solder ball and the PCB pad to melt together and form a seamless mechanical connection during the reflow process. The solder joint will exhibit electrical integrity, but it will fail under mechanical or thermal stress. It is called head-in-pillow because it looks like a head pressed into a soft pillow.
Defects have countless variations of their shapes, and to identify defective shapes is very difficult in HiP inspection. 3D inspection is focused on recognizing fine shape deviations of the solder and then detecting an abnormality by comparing it to an ideal shape. Deep analysis of the solder shape under the ball grid array (BGA) requires lots of measurements of various parameters related to the area of slices through the solder ball, such as circularity, volume, etc. The ability to separate layers and collect volumetric data enables a 3D AXI system to conduct detailed inspection of such solder joints.
Based on years of research from collected customer data, Saki has been able to identify the deviations and trends of what is considered acceptable and unacceptable solder ball shapes. After defining the shapes, they created an inspection log that was turned into a new algorithm that takes AXI capabilities to the next level. The algorithm unifies the various definitions of solder shape and incorporates them into one inspection step. It uses shape detection capability knowledge and combines it with highly sensitive and accurate 3D volumetric data to provide simple and easy parameter setting. This provides the ability to define the correct inspection parameters quickly and easily.
Achieving zero escapes
The number of escapes, or false passes, during production is a significant factor in judging inspection quality. An escape is a defect that isn’t discovered during test. Unfortunately, that defect is often overlooked and found by the customer when something fails. Having too many escapes is very costly to the assembly process in manufacturing time and money. If the defect is found during production, repair or replacement of the part is possible, but this slows down the line or the line has to be stopped. Throughput and yield are decreased. The later in the process that a defect is found, the more difficult and costly it is to fix it or adjust the line. The company’s 3Xi-M110 AXI system produces such high inspection quality and reliability that the inspection process results in zero escapes.
X-ray tube addresses environmental concerns
In any X-ray system, strict adherence to control and use of the X-rays is critical in the system’s operation. With reduction of X-ray exposure as its focus, the company implemented a brand new, closed X-ray tube. The tube of the 3Xi-M110 has a pulse mode capability to switch on and off the X-ray during high speeds. Seventy percent X-ray dose reduction is possible by powering on the X-ray only at the moment of image capture and powering it off while waiting for the board to be loaded. Moreover, conventional closed tubes must be turned on/off periodically, even when kept as a spare part to prevent deterioration of the tube. This is a costly and time-consuming operation.
When using the new 3Xi’s X-ray tube, a tube-lead-box is not necessary. The tube stays in the inspection position during PCB loading and unloading. As a safety feature and to control exposure levels during inspection, the software is equipped with a dose simulator. The user can monitor the radiation dosage and according to that information, the delivery method and magnification can be set. The tube does not require any periodical maintenance or storage of spare parts. The built-in lifetime monitoring system reports the time to replace the tube. The new tube cuts X-ray exposure of the product and inner machine parts in half, minimizing component damage, increasing the life of the detector, and dramatically decreasing the cost of ownership for the system.
Further improvements for production quality control and Industry 4.0
Saki’s total inspection lineup uses the same software and hardware platforms. Together with X-ray, the company offers fast and accurate 3D SPI, 3D AOI, and bottom-side inspection during the printing, pre-reflow, and post-reflow processes. Each inspection process provides its own inspection result data. Their multi-process view (MPV) software shows inspection results from all processes in one place in real time, which enables the operator to analyze and make process corrections based on the inspection results from the previous process. Immediately, together with Saki’s advanced SPC and report function, MPV provides a more comprehensive perspective of the defect analysis for the entire process and serves as a key to improved production quality.
Ikumi Sugawara, Saki Europe
 AXI needs to be faster, ever more accurate, and adopt machine-to-machine (M2M) capabilities to deliver products that ensure quality and reliability. Saki’s systems meet these requirements.
Source: Saki Corporation
Inline 3D-Röntgensysteme kommt bei der Qualitätssicherung eine Schlüsselrolle zu, insbesondere für kritische Anwendungen, da sie eine präzise und schnelle volumetrische 3D-Inspektion ermöglichen.
Les systèmes de radiologie 3D en ligne jouent un rôle crucial dans l’assurance de qualité, en particulier pour les applications critiques, car ils permettent de réaliser une inspection précise et rapide en trois dimensions.
Встроенные рентгеновские 3D-системы играют ключевую роль в обеспечении качества, особенно в критически важных областях применения, так как они позволяют проводить точный и быстрый объемный 3D-контроль.
SAKI Corporation
DMG Mori Tokyo Innovation Center
3–1–4, Edagawa, Koto-ku, Tokyo 135–0051 Japan
Tel.: +81 3 6632 7195
E-Mail: info@sakiglobal.com
Website: www.sakiglobal.com
