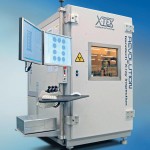
The ability to gain a reputation as a reliable and trustworthy supplier through the continual delivery of defect-free products has never been more important. Customers are becoming increasingly price sensitive so gaining cost advantages through reduced wastage and competitively priced machinery is imperative. In response to this need, X-Tek, a UK based manufacturer of real-time microfocus X-ray inspection equipment located close to Heathrow airport, introduced the Revolution Inspection System also known as the XT V 160. In December 2007, X-Tek was acquired by Metris, a leading international metrology company headquartered in Belgium.
According to the company, the Revolution is smaller in footprint and lower in price than comparative microfocus X-ray inspection systems and provides the highest resolution and magnification possible within a compact system for quality control, research and failure analysis. With the ability to inspect substrates at steep angles of up to 75 °, it is designed for 100 % BGA and µBGA inspection, multilayer board inspection and PCB solder joint inspection in production lines and failure analysis laboratories in many manufacturing areas. A fundamental part of X-ray inspection is the ability to view a product from different angles. The Revolution uses true concentric imaging that enables the operator to choose a region of interest (ROI) to inspect which is then positioned in the centre of the screen. To stay focused on this region, the X-ray source and detector rotate rather than the product. The ROI therefore remains completely locked into the centre of the field of view under any combination of rotate, tilt and magnification, regardless of the sample’s position on the manipulator table. A further positioning feature is provided to view the region from any rotation (360 degrees continuous freedom) and tilt angle of up to 75 °. The system is therefore able to inspect around single or multiple BGA balls as the true concentric imaging feature operates over the entire scan area of the manipulator. Inspecting the rows of BGA balls is also less labour intensive than with standard manipulators as the system’s true parallel tracking maintains the x and y axes parallel to the BGA. This allows the rows to be scanned using a single x or y axis instead of requiring the simultaneous operation of three axis.
Computed tomography
If a sample is to be declared defect-free, internal structures also require thorough inspection. The Revolution employs computed tomography (CT) which is the process of imaging an object from many different directions using penetrating radiation and a computer to calculate the interior structure of that object from the images. Many industries make use of CT including electronics, aviation, medical, advanced materials research, casting and a host of other manufacturing areas. The CT function allows the complete structure of an object to be stored and examined to give a reading of all internal dimensions and the precise size, shape and location of any internal feature or defect. The CT system can be upgraded for real three dimensional analysis of components. The upgrade simply plugs into the existing manipulator controller without the need for future re-wiring or other modifications.
Identification of product defects is highly dependent on the magnification the inspection equipment can offer. The transmission target design fitted to the inspection system’s X-ray source has an ultra thin output window that enables samples to be safely placed within 250 microns of the focal spot providing up to 13,000 x system magnification at all angles over the entire 400 x 400 mm manipulator scan area. This facilitates 100 % BGA, micro-BGA, multilayer board and PCB solder joint inspection, with quick analysis of BGA ball wetting, attachment, cracks and delaminations.
Open X-ray tube development
In addition, the patented X-Tek Xi “Open Tube” X-ray source is reportedly smaller than any other design and allows X-ray images of fine detail in thick and dense samples to be seen with ease. This high energy vacuum de-mountable unit enables views at steep angles through solder joints and heat sinks without ever running out of energy. Another attribute of this technology is the combination of the vacuum tube and the voltage generator. This has resulted in increased reliability and reduced maintenance costs as the extra charges typically associated with servicing separate voltage generators, cables and connections are avoided.
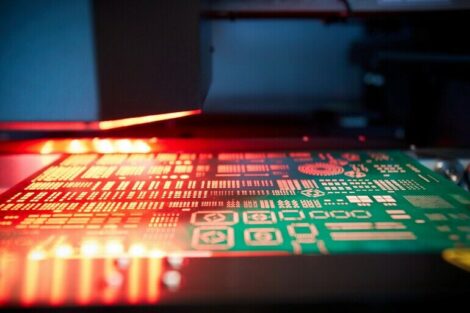
To increase the likelihood of identifying product defects, inspection images need to be of the highest possible resolution. The inspection system employs a tightly controlled microfocus X-ray spot and the latest digital imaging technology including a nanotech target capable of feature recognition to approximately 500 nM. The advanced electromagnetic lens is computer controlled to ensure that the image remains in focus at all kV settings and the target does not burn when using high power. This enables the production of sharp images of micron level features of even the most challenging substrates.
The photography equipment incorporates a dual field image intensifier with a digital camera. This combination (Impix) provides a large field of view, high sensitivity and high dynamic range (16 bit image processing). Combined with the on chip integration (OCI) feature, this equipment allows the user to take advantage of low energy X-ray photons for imaging low density features such as aluminium bond wires, thin copper traces, epoxy voids and more. This is achieved by a very sensitive image intensifier and by gating the digital camera to accumulate a greater signal.
The production of high resolution images is supported by Inspect-X, an advanced image capture and analysis software with special functions for inspection of semiconductor package voids, wire bonding and BGA solder bumps. The software runs under Windows XP Pro on the latest specification processing hardware which enables the resultant data to be saved or exported directly to any COM compliant package, for example, MS Word, Excel, Access and SPC systems. A range of inkjet, laser or thermal printers can then be used to produce photo quality print outs. Inspect-X allows rapid software customisation to suit specific inspection requirements and has been designed to enable quick transfer and sharing of information so that anyone can open and view the information from their PCs.
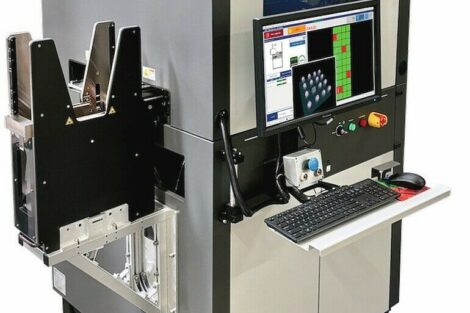
The need for user-friendly and flexible equipment in inspection requires common technology and platforms that are best suited for the purpose. The inspection system is a versatile tool that allows an operator to easily make use of the system’s manual and programmable inspection capabilities. The Windows control screen is laid out logically with all regularly used functions in view on single click buttons. Joysticks are also provided for very fine positioning and control to enable a direct and logical response from both sample manipulator and X-ray images. This enables operators to pick up on even the most demanding defects.
Inspection equipment should be designed for ease of use without compromising performance. The inspection system features advanced viewing capabilities including dual monitors that separate images from the software control and the quad view that allows four images to be displayed at once. This process is useful for image comparison or reference for operators. The system is highly intuitive to operate and as a result, operator training time is significantly reduced. In addition, the system features advanced ergonomics including fully adjustable shelves that ensure all system controls are at the operator’s fingertips whether standing or sitting and irrespective of the person’s height.
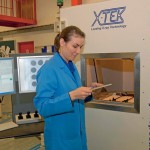
During the inspection process of the manufacturing line there is a high risk of samples being damaged by static as sample trays are often made of anodized aluminium which is not ESD safe (ESD = Electrostatic discharge). To ensure this is avoided, the system features a carbon fibre static dissipative sample tray with an ESD safe side control desk and an additional ESD clip in point. With the ESD control desk there is no need to worry about placing a sample on a work desk and risk static damage.
For any equipment to be deemed a good investment, it must prove itself to be cost effective but also of a high standard. X-Tek’s open X-ray tube development has driven down the size, weight and cost of the system whilst delivering a good quality and performance. The introduction of a patented zero maintenance cable-less Xi generator has meant that preventative maintenance has been dramatically reduced making the long term cost of ownership considerably lower. In addition, the Revolution’s volume for sample manipulation provides a generous 400 x 400 mm (16 ” x 16 ”) scan area in a system with a footprint of only two square metres thereby reducing the space and costs associated with storage of the machine.
EPP Europe 452
zusammenfassung
Das Mikrofokus-Röntgen-Inspektionssystem Revolution wurde um die Computer Tomografie (CT) erweitert. Das System ermöglicht einen Rundum-Blick (360 Grad) auf die zu untersuchende Region. Der Neigungswinkel beträgt 75 °. Das System nutzt eine echt konzentrische Bilddarstellung, die es dem Benutzer erlaubt, einen Bereich zu definieren, den er untersuchen will und der in der Mitte des Bildschirms positioniert wird. Um die eingestellte Tiefenschärfe (Fokus) beizubehalten, werden sowohl die Röntgen-Quelle als auch der Strahlendetektor bewegt, nicht aber das Prüfobjekt.
Le système d’inspection par radioscopie X à source microfoyer Revolution s’est étendu au domaine de la tomographie computérisée. Le système procure une vue sur 360 degrés de la zone à examiner. L’angle d’inclinaison atteint 75 °. Le système utilise une représentation d’images réellement concentrique pour permettre à l’utilisateur de définir la zone à examiner, qui est alors placée au centre de l’écran. Pour conserver le réglage de profondeur de champ (foyer), la source de rayons X et le détecteur de rayonnement se déplacent, contrairement à l’objet examiné.
Al sistema di controllo a raggi x a microfuoco Revolution è stata aggiunta la tomografia (TAC). Il sistema consente un esame a 360 ° della regione interessata. L’angolo di inclinazione è 75 °. Il sistema utilizza una rappresentazione dell’immagine realmente concentrica, che consente all’utente di definire una zona da esaminare e da posizionare al centro dell’immagine. Per mantenere la profondità di campo impostata (fuoco) vengono spostate sia le sorgente di raggi x che che il rivelatore, ma non l’oggetto in esame.
Company details
X-Tek celebrates its twentieth year as a global supplier of quality real-time microfocus X-ray inspection equipment for quality control, research and failure analysis. Its extensive R&D department ensures that it is able to remain innovative in the equipment and solutions it provides. With offices in the USA, UK and Hong Kong, the company also has a worldwide network of agents providing sales and service support to maintain its leading position in global electronics.
Metris designs, develops and markets a wide range of 3 D hardware and software inspection systems servicing design and manufacturing industries. The company’s metrology solutions cover the full range of measurement volumes required by automotive and aerospace customers, in both fixed and portable configurations and with optical and touch sensors. Headquarters are based in Leuven, Belgium, with additional production and development centers in Belgium, UK, Italy, US, China, India and Bulgaria. The company provides a worldwide network of sales and support offices located in Europe, Asia, and the US.
Share:
