Speeding up time to market is essential. Significant technological developments have recently made it possible for Tera bytes of data to be shared and analyzed through simple web access. These evolutions enable the transformation of overwhelming inspection data/images into actionable process information and knowledge. Moving to evidence based decision making enables SMT assemblers to shorten time to quality: from NPI to high yield production.
Speeding up, the entire product life-cycle to enable companies to bring products to market quicker requires continual application of new technologies, automation, analytics and manufacturing know-how.
Industry 4.0 initiatives, aiming to interconnect equipment and data, pave the way for process engineers, operators but also equipment to apply facts based decision making. Moving away from human analysis of complicated and fragmented data to automatic sharing, analysis and correlation of data leads to evidence based decisions and enables SMT assemblers to shorten time to quality: from NPI to high yield production.
These initiatives, are possible by recent significant technological developments in computing power, data access, and storage; opening a new era in SMT process information and knowledge. Integrated solutions, that transform overwhelming inspection SPI and AOI data/images, into smart actionable process information are now available. This information resides on a server and accessible to anyone through a web browser. These solutions contribute at every step of the product life-cycle and reduce time to yield:
NPI
- Software assisted experience maps at print, pick & place and reflow using SPI & AOI data & images allow designer and process engineers to shorten design qualification, equipment selection and process optimization time
Production ramp-up
- Reduce time and improve inspection program tolerance optimization at both SPI & AOI
Efficient inspection means high inspection quality: zero escape, zero false call. This comes from a well-adjusted SPI & AOI tolerances. Setting the process tolerances, used to be challenging. Extracting useful information or building process knowledge from bad data is tedious and most often ineffective.
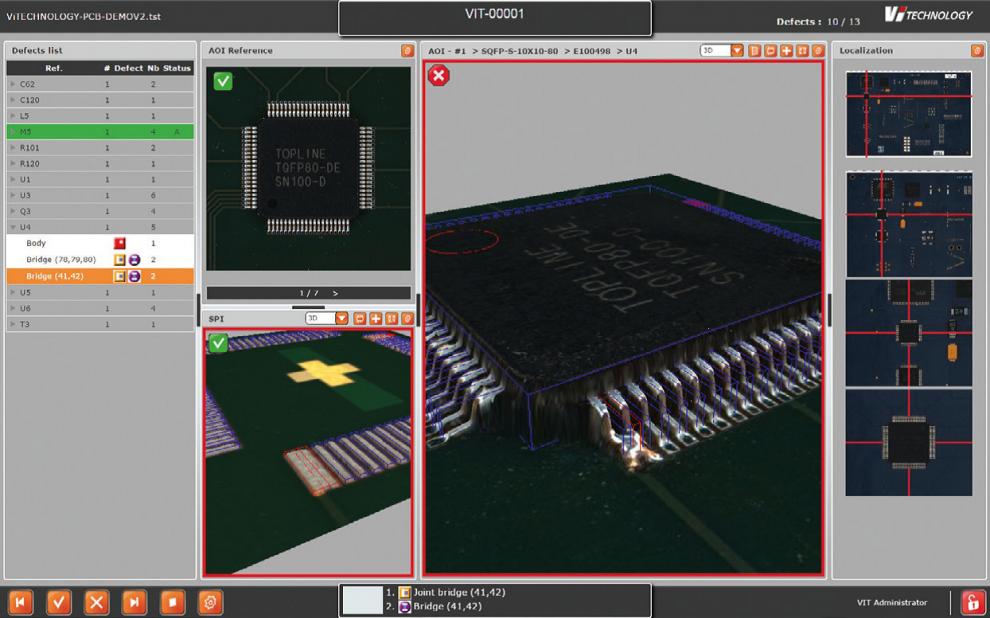
Through data and image correlation, process engineers can now set tolerances at SPI, after having clearly identified and visualized the consequences of these tolerances at AOI. Having AOI acquire an image at a location where SPI detected a defect helps engineers to optimize AOI tolerances and reduce escape risks or alternatively drives the software to suggest performing X-ray inspection end of line should the defect not be detectable at AOI (e.g. BGA paste volume defect on an individual pad). A defect detected as a warning in SPI and as an error in AOI leads engineers to tighten tolerances at SPI to detect the defect as an error rather than as a warning in SPI.
A fact-based approach for setting tolerances, greatly reduces optimization time and yield higher quality inspection
- Educate review operators and provide them with additional information to reduce false accepts
Reviewing and classifying defects in high volume production environment is demanding. In high quality plants, false accepts are often the largest source of end of line escapes.
Data correlation, statistics and the ability to drill down to images to display all defects detected at both SPI & AOI and misclassified by the operator as a false call in SPI or AOI, contribute to better training of operators.
Full volume production
Displaying images of SPI at the exact same location where an AOI defect is detected provides operators with more comprehensive information to classify defects and thus reduce the risk of false accepts. In most cases, it also significantly reduces manpower requirements.
With the proper tolerances setting at SPI & AOI and well trained review operators; full volume production is on the way. Real time statistics, data correlation, and drill down images help to keep a high yield. When a defect occurs in production however, finding its root cause has always been difficult and time consuming. By combining and correlating inspection results of the panel at different steps in the process, root cause analysis can be performed automatically by software saving precious time, resources and yield. In addition, when automatic root cause analysis is run on all products and all lines in the plant, yield is optimized at critical process steps and process knowledge grows, sometimes leading to improved design.
Finally, high computing power, data access and storage capabilities, coupled with traceability, offer an enriched analysis of field returns by providing data and images at every step of the panel production cycle. Moving to evidence based decision making clearly enables SMT assemblers to shorten time to quality: from NPI to high yield production. Moving away from data analysis to evidence based decision making enables SMT assemblers to shorten time to quality: from NPI to high yield production. Built around a powerful web-based software suite, correlation of SPI and AOI data and images, feedforward of SPI information to AOI, automatic root cause analysis of defects, Sigma Link reveals the actionable process information buried in Tera bytes of inspection data.
Listen to the presentation live at
 Budapest, May 25th, 9am – 5pm
Register for FREE
Please use the registration code OLHUN17.


